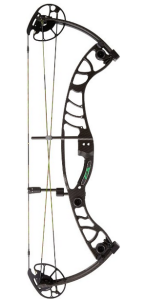
PSE Stinger X: An In Depth Review

With a forgiving brace height and adjustable draw length of six-inch increments, the PSE Stinger X is a great shooter at an affordable price. However, it does have a wide grip, doesn’t come with a string stop, and is a bit noisy if a vibration dampener is not added.

The Stinger is a good value for those who want to go hunting with it. It has everything a hunter needs: accuracy, speed, and consistency. The price is under three hundred dollars, so that’s always a plus! With a six-inch draw length adjustment, the bow can fit many different types of shooters, making it a good option for beginners who want a bow that will grow with them. Combine the short axle to axle length with a smooth draw and this bow will work well in tight quarters like a tree stand or ground blind.

Finish

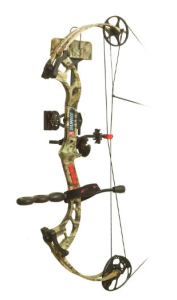
PSE Stinger XDepending on the model that you purchase, you may or may not have choices when it comes to the finish. Older models were finished with mossy Oak New Break-UP or Mossy Oak Treestand while the newer models coming with Infinity or Skulz Camo. But no matter what finish you get, it’s guaranteed to last the lifetime of the bow, which is quite some time.

Limbs and Riser

The riser on this compound bow is a simple design, but this allows the cost of the entire setup to be low. The shape comes from a CNC machine to the 6061 T6 aluminum, which has been attached to the limbs through machined aluminum limb pockets. The limbs used on this bow are precision-engineered and are pre-stressed for optimal performance.

Grip

The Stinger comes with a Vibracheck rubber grip, which gives a soft and comfortable feel that also helps to suppress the vibration. However, the grip is a bit wide and can induce a little torque. If you’re not a fan of this grip, it can be switched out with the older style PSE grips, wood or plastic, whichever you prefer.

Eccentric System

The Stinger has used a few different cam systems throughout the production stages. The current Stinger uses a new HP cam that is designed to be adjustable and have a smooth draw cycle. It’s also meant to produce a consistent shot. The difference with the new HP cam is that it has an increased IBO speed of 316 feet per second. Every cam system allows the draw length adjustment with the use of an Allen wrench. The newer models have a let-off of seventy-five percent that’s fixed.

Draw Cycle and Shootability

The Stinger has a smooth draw cycle due to the single cam performance system. This setup is well balanced when released; however, it does have a noticeable vibration. Adding a string stop and stabilizer will suppress the vibration to the point that it’s so low you’ll barely notice it, keeping the bow quiet. In addition, the forgiving brace height helps make it easier to shoot even for an inexperienced archer.

Hunting

The Stinger has been built for hunters who are on a budget. The short AtA length makes it excellent for in the ground blind or in a tree stand. In addition, the bow is light making it good for spot and stalk hunting, too. The bow may be built in a small package, but it has enough power and speed to take down any game a hunter wants.

In Conclusion

The Stinger is definitely a simplistic bow. It doesn’t have the bells and whistles that the higher end ones do, but it’ll definitely get the job done well. Adding a few inexpensive components will definitely help this bow shoot like one that costs a lot more. Combine the price with the shootability and you have an excellent bow for beginners and experienced archers. The setup can be a good fit for teens due to the six-inch draw length adjustment so that it can grow with the archer. Because of the affordability and shootability, some hunters purchase the Stinger as a backup bow.

Overall, this bow is inexpensive but will still get the job done well.

SAS Rage Compound Bow User Review

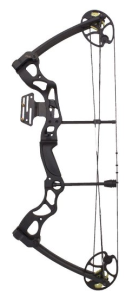
SAS RageThe SAS Rage is one of the better choices for shooters who would like to develop their shooting capabilities without having to spend a fortune. The high quality and durable compound bow makes it perfect for harnessing your archery abilities. Don’t let the price fool you. It gives you a lot more than you’d expect from an entry level bow. The materials used are of high quality and it fits all the standard upgrades and parts.

The bow sight and arrow rest come with the bow could be better and you might want to consider purchasing an upgrade kit in the future, but for the price of this bow, you can’t really complain too much. The bow is a great bargain that offers an overall great experience for people who are on a budget. If you can’t spend more, then don’t. Purchase the SAS Rage!

This bow is good for beginners and hunters alike.

Features

The bow comes with compressed ABS limbs that will last quite some time. It is a weight of 4.4 pounds, has a draw length of twenty-six to thirty inches, and a draw weight of fifty-five to seventy pounds. It’s maximum speed is 270 FPS, making it great for hunters.

Pros and Cons

The bow is made of very high-quality materials that will make it last for quite some time. It’s a good bow to start within its price range, making it an excellent investment. While the bow looks small, the draw length is surprisingly good for those who of the average stature and the bow allow adjustments in pound pressure and draw length to make sure it fits well with the shooter. The bow looks very sleek and professional and is easy to set up out of the box.

The draw on this bow is strong, and that’s really the only con about this bow.

Description

The limbs are held in their spot with the back pivoting limb pockets, which have a sturdy link with stiff tolerances for improved accuracy. The riser gives the bow a curb appeal look, and the number of cutouts in the riser provides this compound bow with a waffle look. When the string’s pulled back, the bow has around fifty-five to seventy pounds of force, depending on the setting you choose. Al it takes is one turn of the limb bolt to increase or decrease the weight by five pounds. Once the string is released, the arrow is launched at a speed of 270 FPS.

Hunting and Competition Shooting

The SAS Rage is probably not that good for shooting competitions because it can be a bit tiring to use, but it would be good for the experienced hunter. The bow is precise and has a let off of seventy percent, and it’s relatively quiet. You won’t scare away the game with this bow!

Age Range

The bow is definitely for men who are able to draw back a heavy bow, so it’s not something that smaller framed women or youths should be trying it. This bow was definitely built for hunters who are taking the time to draw back, aim and want a strong KE behind the arrow.

In Conclusion

The SAS Rage is a good bow out of the box for someone who is experienced with bows and knows they can handle a strong draw. It’s also for those who are looking for a good bargain when it comes to compound bows. Overall, it’s a good buy; just realize that it takes a bit of strength to use this bow.

PSE Surge RTS Review

PSE SurgeThe PSE Surge RTS was originally designed to replace the PSE Brute X, which was a phenomenal bow. The Surge, however, is affordable and tunable. It’s definitely a bow that’s worth the money, comes in a ready to shoot package with everything but the arrows, is vibration-free and quiet, and has a smooth draw cycle. The only downside about this bow is that it’s a bit heavy.

When you order the bow, it comes with the bow, a three pin sight, rest, a stabilizer, shadow quiver, sling, peep sight, and nock loop.

Cams

The cams are single, medium draw cams and let the bow be drawn back smoothly. The draw cycle is gentle, without a transition or lobe over. The difference from the EZ draw cams from the olden days is that the bow shoots at a speed that is much faster. This bow has an IBO speed of 320 feet per second, allowing you to get the arrow to the target efficiently and quickly.

Draw Length and Draw Weight

This bow features a tunable limb bolt that turns a full twelve turn. The average compound will only turn four times. This allows you a thirty-pound range of draw weight to let the Surge grow with you. You can order the bow at its peak weight, but you actually get a thirty to sixty-pound bow that you’re able to fine-tune with a hex wrench.

Shooting Speed

The PSE Company lists the shooting speed rating for their PSE Surge at 320 FPS. The IBO ratings are always shown with thirty-inch draw, 350-grain arrows, and seventy pounds draw weight. The reality is that the speed will most likely be lower than that.

Kinetic Energy

The KE of any compound bow will vary greatly, depending on how the bow is set up, and the Surge is not an exception. Different draw weight, arrow weights, string accessories, draw lengths, and even the arrow fletching height and length will influence the KE your bow can produce. Let’s say you have a seventy pound PSE Surge with a twenty-nine-inch draw length and 425-grain arrows. You can expect the arrow to get around 280 FPS with seventy-four feet pounds of KE. You’ll lose two feet pounds of KE every ten years your arrow goes so you can expect a fifty-yard shot to have sixty-four feet pounds of KE.

The Bow’s Draw Cycle

The only downside to this bow is that is has a slightly narrow valley, but that’s not really a deal breaker. The bow is very smooth to draw and has an excellent balance of power and smoothness. For a ready to shoot bow at this price, the Sure is one of the best in its class for power levels and draw cycle.

Noise Level and Vibration

There is very little noise or vibration with the PSE Surge, and there’s almost no hand shock when the bow is shot.

Hunting

Using the highest settings on the bow and 425-grain arrows, the Surge is definitely a powerful bow for hunting. It’s powerful enough to take down the largest game in North America, including a grizzly bear. You could take down an elephant with this bow.

Limbs, Rise, and Grip

This bow has split limbs rather than solid limbs. Even though there isn’t an gain to split limbs over solid limbs, this bow looks really good with the split limb technology. A machined aluminum riser with a Raptor grip makes this bow look mean. The riser and limbs are both strong and durable, meaning you can adjust the Surge to normal wear and tear conditions without worrying.

Value

The PSE Surge delivers a definite bang for your buck when it comes to value. It’s an inexpensive compound bow and delivers the features and benefits that the more expensive compound bows fail to deliver. It also includes everything necessary to get started expect the arrows, and is adjustable to almost anyone’s shooting needs.

In Conclusion

The PSE Surge is overall and excellent bow for those who want to go hunting small to large game with it, and it’s also an excellent choice for those who want to do some competition target shooting. Overall, it’s an excellent value for the money and can grow with the shooter as their needs change. The PSE Surge is definitely a bow to keep in mind when looking for options!

PSE Prophecy Compound Bow Review

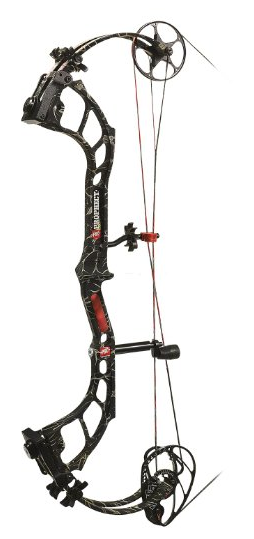
PSE ProphecyThe PSE Prophecy is one of the fastest single cam bows at 340 FPS. Its adjustable draw length of twenty-five to thirty inches without swapping a cam or purchasing a module makes it a versatile, well worthwhile investment. The only drawback of this bow is that the draw cycle might be a little too aggressive for some.

The PSE manufacturer is known for making smooth drawing speed bows and the Prophecy is one of their best yet. It’s one of the fastest bows that have ever been produced and comes with a good amount of technology at an affordable price. The speed of the dual cam compound bow with the tenability of a single cam bow is greatly appealing to numerous shooters. With a 32” AtA measurement, the Prophecy is easily held on stationary and live targets and lives up to the accuracy standards of high-performance rigs. Those who are interested in speed but want a single cam bow will not be disappointed with how this bow shoots.

Finish

This bow comes with some really professional looking finish options for target shooters and hunters. PSE does an excellent job of dipping their bows to make sure they look amazing and they stay looking that way for years to come. The Prophecy is available in the Mossy Oak Break-Up Infinity or a mix of an Infinity camo limb with a black riser. You also have the option of an all-black bow, too. The skull works camouflage is a black finish that shows antlers and animal skulls of different large games species. The pattern is a popular option for this bow.

Riser

PSE dresses up the Prophecy with a planar flex riser. This technology had been reserved for the proline series in the past, but they’ve decided to add it to the Prophecy series. The riser has excellent strengthen that’s meant to reduce sideways torque and front and back torque when the bow’s fully drawn. Although a shooter is not likely to feel a difference, they will notice a difference in accuracy. The bow is not very light, weighing around 4.1 pounds total, but it doesn’t feel that heavy, either.

It also has a Backstop 2 rare mounted spring stop system. The system is micro-adjustable for the length and rotational for the shooter to get the best fit when it comes to where the string hits after the arrow has been released. The rubber stop also is color customizable if the shooter wants to match it to the rest of their accessories.

There’s a front mounting stabilizer hole in the front of the string stop system. Front mounting stabilizers are common on bows today, and when they’re mounted on the front of the string stop system, it gives the energy a place to go other than the shooter’s hand.

Grip

The grip on the Prophecy is a little difficult for some to love in the beginning. Many shooters have some trouble in the beginning with the skinny rubber plated side grip. The grip is skinner than most other grips by other manufacturers. Shooters are forced to have a good hand placement when they grip this bow. Although some shooters might have trouble adjusting, they’ll eventually be comfortable with the proper form. In fact, most will end up preferring this grip after they spend some time shooting it. The rubber side plates come in either black or red, but the bow is shipped with the red installed.

Limbs

The company has incorporated past parallel split limbs on the Prophecy series. Limb bolts can be turned out a total of ten turns, letting there be around ten pounds of adjustment. Maximum weights are available in ten-pound increments with the maximums being fifty, sixty, and seventy pounds. The limbs feature the logo of the bow, which looks excellent with any finish background installed. They also come with a vibracheck band dampener.

You do not need a bow press to install new bands, which makes changing them a lot easier than it used to be.

Draw Cycle

The AMP cam is made for speed. Those who want a bow in the single cam should understand that this comes at a high price. In this case, the Prophecy is a bit more aggressive than other single cam bows. However, the Prophecy is not as harsh as you might imagine before you shoot it. The draw is pretty smooth from start to finish and you can hold it back to target much longer than other bows at this speed.

The shock and sound are almost nonexistent with this bow. Overall, the bow’s powerful and holds on target a lot better than it would be expected with a thirty-two-inch AtA.

Usage Scenario

The Prophecy was designed with the hunter in mind. Like most hunting bows, it performs well on the range but is designed to be in the wood. With the thirty-two AtA measurement, single cam, and 340 FPS, shooters get the best of both worlds with this bow.

In Conclusion

A single cam that produces 340 FPS is definitely worth a test shot, even if speed is not your concern. The Prophecy has some amazing technology for a mainline bow and will appeal to those who are interested in hunting. The adjustability is easy without a press or needing to purchase parts to make the bow user-friendly and easy to work on. The draw can be aggressive, and it can take some time to get used to the seventy-five percent let off. However, hunters really should check this one out!

How to String a Recurve Bow

If you are an archer who is new to the art of stringing a recurve bow, you are going to want to invest in a bow stringer. Expert archers recommend bow stringers because the simple tools offer archers the safest method for stringing and restringing a bow for use. What’s more, a bow stringer is an inexpensive investment: One that can protect an archer from accidental injury as well as unintentional damage to the bow in question.

Bow stringers usually cost under $20.00, but some of the pricier models can go as high as $40.00. The stringer is manufactured with leather and cord, surgical tubing, or plain cord. At the end of each cord, the archer slides a flexible, soft limb gripper onto the limb until it is firmly in position. The unit is often fitted with a tension slider so that it will fit an array of bow lengths. Alternatively, some bow stringers come with a limb cup (pocket) made of durable, but soft materials: The cup slides over the tips of the bow and remains firmly in place.

The tool causes the limbs on the recurve bow to bend so the archer can put the string into the groove (nock) on the bow with greater ease, and with no risk of self-injury or equipment damage. The stringer also helps in preventing the undesired twisting of the upper and/or lower bow limbs, which can ultimately result in the development of a crack or fracture in the bow’s structure. Before bow stringers, archers would rely on the step-through method in order to string a recurve bow, which worked, but came with considerable risks. The innovation of the stringer now ensures stress reduction on the upper and lower limbs of the bow as well as on the archer’s body.

There is considerable resistance when an archer is attempting to string a bow using the step-through method; a sudden, unexpected interruption in that resistance can lead to undesired injury. A good deal of body strength is needed to string the bow using the step-through method, whereas a bow stringer makes it far easier for the archer to string a bow, even when dealing with the tension and resistance the bow structure creates initially. What’s nice about a stringer is the equipment is lightweight, which lends to its ease of portability.

Buying a Stringer versus Making One

Some archers choose to forego buying a bowstring for the act of making one. Making a bow stringer is easy. The archer will need some cordage or a Nylon rope measuring over six feet long and a piece of leather measuring a minimum of four inches by three inches. The archer cuts up the leather material into separate strips measuring 1.5 inches by 4 inches. Once the archer cuts the strips, the individual can use a Phillips-head screwdriver for the purposes of poking two holes into each cut strip of leather. The safest method for doing this is to position the leather fabric on a piece of scrap wood and to use a hammer to tap the screwdriver just hard enough to drive it through the leather material. The archer positions and centers the holes at the short ends of the leather strips. The holes the archer creates will have to be large enough in order to allow the rope or cordage to pass through the holes with ease.

The archer will also have to cut the rope to length, and it should be no shorter than six feet. The archer then seals the ends of the cord by taking a match or lighter to it and heating it up. Once you pass the Nylon rope through both holes on the leather piece, it creates a loop that forms a handle. The archer has to tie the rope off with an overhand loop knot to ensure the durability of the tie. Once the rope is tied, the archer can pull on the rope to check the security of the knot. The same process is repeated for the other piece of leather and the opposite end of the Nylon cord. The end result is a bow stringer made of Nylon rope and leather. Ultimately, the newly made bow stringer requires testing to ensure it is secure. Herein lays the difference between the manufactured bow stringer and the one an archer makes at home: If it is made incorrectly, it could result in damaged equipment or possible injury when used, and for the homemade stringer the archer is entirely responsible for ensure its secure structure. A manufactured bow stringer is ready to use when it comes out of the box and many are sold with a product guarantee.

Using the Bow Stringer – Step by Step

Today’s bow stringers are manufactured in two distinct styles: The Double Pocket Bow Stringer and the Saddle Type Bow Stringer. Both of the latter kinds of bow stringers are fitted with durable Nylon cord. The stringers are also fitted with a pocket made of leather or rubber. The pocket slides over the tip of the bottommost bow limb when you are using the Double Pocket Bow Stringer. In contrast, the Saddle type Bow Stringer the unit has leather or rubber saddle featuring a rubber, dimpled surface. No matter what type you choose, the bigger pocket is for the lower limb tip: Once in the position, it will maintain the bowstring’s position inside the groove cut into the end of the bow.

With the Double Pocket Bow Stringer, the other pocket slides over the tip of the uppermost limb on the bow and lets you put the string inside the bow’s groove or slot. When using the Saddle type bow stringer, it will fit behind the bowstring that is then looped around the bow’s uppermost limb. Position the bottom loop and make sure it is fit in the string groove of the bottom limb. The large pocket on the bow stringer is then slid over the tip of the limb, the string, and the loop.

Hold the bow with the structure of the bow horizontal and parallel to the floor. When restringing your recurve bow, find the upper string loop (the larger of the two), slide it over the uppermost limb, and tip when using the double pocket model. When using the saddle type model, you have to slide the saddle (dimpled surface) over the uppermost limb and beneath the bowstring’s loop. Slide the saddle on the limb and position it right behind the uppermost string loop.

Grab the bow by the center or riser where the handle grip is located. Position the saddle piece with the opposing free hand. You want the bow stringer’s cord to make contact with the ground. Put the ball of each foot onto the cord. Refrain from placing the arch of your foot on the string: This can cause string slippage if the cord moves from under the arch of the foot.

Pull up any existing slack. Put your index finger and thumb behind the string loop on the outer edge of the limb, and make sure all the slack is pulled up. Draw up the bow using the hand you are holding it with: Do this in a single motion to force the upper and lower limbs to move in a downward direction simultaneously. While you are doing the latter movement, slip the bowstring upward on the limb with the opposing hand until you get it inside the nock for the string. Take one finger to ensure the security of the string inside the nock.

Move your feet off the cord. Turn the bow around and put the string toward your body with the upper and lower limbs directed from your body and perpendicular or vertical to the floor or ground. Taking the latter stance ensures your safety. Do a thorough inspection of the string’s positioning to make sure it fits in the notches, there are no frays, and that the tension is good. Once you are certain the bow is the way you want it, you can remove the bow stringer.

Sources:

Archery Exchange’s “Using a Bow Stringer.” Website. URL: http://www.archeryexchange.com/shopcontent.asp?type=bowstringerinstr.

Wolf and Iron’s “How to Make a Bow Stringer.” Website. URL: http://wolfandiron.com/make-bow-stringer/.

Archer’s Talk: Archers Helping Archers. Website forum. URL: http://www.archerytalk.com/vb/showthread.php?t=877812.

Field & Stream’s, “Bow Hunting.” Website. URL: http://www.fieldandstream.com/answers/hunting/bow-hunting/bow-hunting-whitetail-deer/would-recurve-bow-stringer-be-good-investment.

Reddit. “Why Should I Always Use My Bow Stringer?” Website. URL: https://www.reddit.com/r/TradBowhunting/comments/2ry6f2/why_should_i_always_use_my_bow_stringer/.

JT’s Bearfoot Outdoor Adventures’ “How to Use a Bow Stringer for a Recurve Takedown.” Video. URL: https://youtu.be/aZgTjLQLWsg.

How to Tune a Recurve Bow for Accuracy

If your recurve bow is not tuned or poorly tuned, it ensures two things: Your bow and arrow shots will not be accurate and your will have considerable difficulty repeating the same types of shots with any kind of consistency. To ensure the greatest amount of accuracy when bow shooting, you will have to tune the bow correctly. The accuracy of your shot is highly dependent on three factors: bow tuning, biomechanics, and shooter’s attitude at a percentage of 10%, 20%, and 70% respectively. Even when assigned the smallest percentage in terms of importance, it does not lessen the need for bow tuning to ensure the greatest possible shot accuracy.

Tuning a Recurve Bow in Brief

Bow tuning requires several steps. First, the archer has to adjust the string height from the bow’s riser, which should measure between 7 to 9 inches from the riser to the area where the bow’s grip is located. Once the string height is located, the archer then takes a number of test shots with arrows that are fletched and not fletched. How the arrows hit the target gives the archer considerable insight into how the bow is functioning and what kinds of adjustments must be made to improve the overall accuracy of the shot. The nock height also has to be perfected with you are tuning a recurve bow as it lends to the ease of arrow release and the accuracy of the shot.

Establishing Your Brace Height

The brace height is the distance between the middle of the bow string and the throat or grip area of your bow. Often times the bow manufacturer will supply you with information on how to establish the ideal brace height for your needs. To adjust the brace height and to make it longer, you will have to take off the bow string by removing it from one of the bowstring nock and twist the string to shorten it. Once you’ve twisted the string, you then replace the end of the bowstring in the nock on the bow. After establishing the initial brace height, you have to take a few shots with an arrow to see how it feels.

If the height is set too low, you will feel a vibration in your bow’s limbs and the bow string may slap your forearm after you fire off a shot. The bow can also prove to be a noisy shot if the brace height is not established with accuracy. You will have to continue to make adjustments to the height until all the latter mentioned issues are resolved. Three to five twists of the bowstring in an effort to shorten it with each attempt is sufficient. You will be looking for what expert archers call “the sweet spot,” where the noise vanishes, and the limb vibration and hand shock also disappear. Once you achieve this brace height adjustment, you’ve tuned the brace height correctly.

Setting the Bow’s Nock Set & Bare Shaft Tuning

To set a bow’s nock set you must begin by holding the bow facing the ground. An arrow is fitted in the nock and is also pointed toward the earth. Tap the bowstring. When you do, the arrow should drop clean away from the bowstring with ease. If the nock does not free from the string that quickly, you can use a small piece of sandpaper of 150 or 220 grid, you can sand the nock a bit to loosen the connection. Other options include taking plastic nocks and placing them on the shaft of the arrow and putting them in boiling water all the way you to the base of the arrow groove: Do this for the count of ten and remove them from the water. Put them onto the bowstring and allow the over tight nock to sit for a half minute: This will loosen the nocks so they fit just right.

Expert archers sometimes use a T square to set the nock set and positioning of the arrow. To do this, you will have to take a number of shots with the bow and arrow to see what shot and position get you the greatest amount of accuracy. You will have to shoot fletch and unfletch arrows for comparison. The shots you make can tell you much about the condition of your bow set up.

You will be taking practice shots at about 10 meters from the target. If your fletched arrows are higher than your unfletched arrows when they hit your target, it suggests your nock is too high. If this is the case, adjust your setup about 1/32 of an inch and try your shots again. You will continue to repeat this process until you get the shot accuracy you desire. If you are right handed and your unfletched arrows are coming up to the left of your fletched arrows, it suggests the arrows you are using are excessively stiff. If the unfletched arrows are below the fletch arrows, it suggests you have to adjust the nocking point by lowering it. If the unfletch arrows are to the right of your fletched arrows, it means the arrows are not hard or stiff enough.

To adjust arrow stiffness, you can try shooting with different arrow weights. To weaken the arrow spine you can add a heavier point to your arrow. If the arrow is too stiff, you can use a lighter point. You also have the option of shortening your arrow by 1.5 inches at a time to get the fletch arrows to align correctly.

You can repeat this process at 20 meters for the newbie archer, and 30 feet for the more experienced. The repetitious testing and adjusting leads to a finer tuning of your bow. Once completed, your bow will be tuned to ensure the best arrow flight for every shot you take.

Bow Stabilizers

For additional stability and balance, archers will use a stabilizer on their bow. The stabilizer helps in diminishing the effects of vibration caused by movement, which is capable of causing deviations in the direction of your arrow when it is in motion. Archers can use a v-bar stabilizer to add additional weight in the region of the riser and grip. The stabilizer must be away from the bow’s handle however in order to supply the desired balance and stability it is capable of providing. If the stabilizer is positioned behind the bow’s grip, it makes for more mass being added to the bow’s structure and, in turn, ends up neutralizing the stable elements the archer is trying to achieve. The stabilizer needs to add the least amount of mass possible as a lighter bow mass lends to greater control when it’s windy outdoors.

Some archers also opt for upper limb stabilizers to diminish bow vibration once the shot is fired. The upper limb stabilizers are really optional because a bow that has been tuned accurately does not demand the use of an additional stabilizing element.

Bow Tillering

When you are making a tillering adjustment to your bow, you are establishing a balance between the bow hand pressure and the string finger pressure or the difference between the center of the bow an above the bow’s center. Getting the tillering right ensures the bow noise is reduced, that the limbs work in unison, and that aim has greater accuracy overall.

You are adjusting the area where the arrow leaves the bow by moving the nock point. Your hand will sit at the center of the bow so the arrow is positioned above the same center. The nock point on the arrow string is also above center position. When you shoot the recurve bow, you will most likely use a Mediterranean grip where you end up pulling the bow string away and off the center point of the bow. The creator of the bow often makes the lower limb of the unit stronger for this reason, and when you are tillering the bow, you are adjusting for this difference.

To adjust a bow’s tillering, you will stand roughly five meters from a target with your bow in full draw. Close your eyes for a period of five seconds. When you reopen your eyes, your bow should still be aimed at the same location it was aimed at when you closed them. If you discover your aim is off and you have shifted up away from the target, the uppermost limb is excessively strong; you will have to lower the weight by a quarter turn and repeat the test. If your aim moves below your initial aim, the bottom most limb is too strong and you should lower the weight by a quarter turn and retry once more.

Sources:

Archery Australia’s “Recurve Bow Tuning.” PDF File/Booklet. URL: https://assets.imgstg.com/assets/console/document/documents/1213%20recurve%20bow%20tuning%20booklet.pdf.

Archery Forum’s “Tuning a Recurve Bow.” Website forum. URL: http://www.archery-forum.com/showthread.php?13320-Tuning-a-recurve-bow.

Archery Talk: Archers Helping Archers. Website forum. URL: http://www.archerytalk.com/vb/showthread.php?t=2382290.

Wendouree Archery Club Inc. “Bow Tuning FAQs.” Website. URL: http://www.wendoureearchery.com/bow-tuning.html.

THQ’s, “How to Tune a Recurve Bow.” Website. URL: http://support.thq.com/entries/43844605-How-To-Tune-A-Recurve-Bow.

Archery Safety: Making a Safe Sport Even Safer

Archery has become increasingly popular lately, particularly when considering movies like Brave and The Hunger Games bringing the sport onto the big screen. It seems as if a major revival in the interests in archery is ever increasing, and will continue to rise. According to ArcheryTrade.org, as o 2013 more than 18 million people practice archery: That is about one out of every 12 people in the United States. As per 2012 statistics, .8 percent of archers participated in bow hunting, while 2.8 percent participated in bow hunting and target archery. In the same year, 84 percent of bow hunters were men and 41 percent of archery-only shooters were women. Roughly, 42 percent of men were ages 18 to 34 and 45 percent of women who got into archery were 35 to 55 years of age.

Clearly, many adults find the sport particularly appealing. The practice also appeals to the young. As of the year 2013, USA Archery, which serves as the nation’s governing body of the sport, has witnessed a 121 percent increase in the interest in learning archery. Compared to two years prior where there was a 104 percent increase in archery interest among teens, and one can easily see the interests in the sport are still on the rise today. Of course, with rising interests, many parents question the safety level of the sport as well. In fact, parents may be quite surprised to find that archery is amazingly safe.

Many archery ranges have never witnessed an injury or accident. As per information made available by the National Safety Council, archery is more than three times safer than a game like golf. Statistics reveal for every 2000 archers participating in the sport, that a single person will be injured whereas in a game like golf, one out of every 625 people gets injured. Statistics also reveal that in as much as 94 percent of any injuries that are archery related are due to the individuals hurting themselves by cutting their fingers on razor sharp arrowheads. These latter types of arrowheads are only for use during hunting (they are ultra sharp to make for better piercing of animal flesh) and, therefore, do not cause a problem on the archery range.

The most common injuries one faces when participating in archery following cuts include forearm injury resulting from when the bowstring slaps against the forearm: An issue that can be reduced by wearing a forearm guard when using the bow and arrow. Statistics reveal bystanders have not been injured in ranges and the very rare occasion outside the range that a bystander is injured as well. Essentially, with the use of good equipment and with heightened awareness, many injuries and safety issues can be eradicated quickly. The need for greater archery education is revealed in “Epidemiology of recreational archery injuries” appearing in a 2012 issue of the Journal of Sports Medicine and Physical Fitness. In the latter article, researchers from George Mason University’s College of Health and Human Services assert that while there is some risk for injury due to lacerations, these risks can be reduced when the archer takes a bow hunter safety education course that places emphasis on how to handle broadhead arrows safely. The experts also found that participation in an accredited archery training program helps in minimizing the likelihood of acute injuries occurring, while back injuries or chronic shoulder injuries can be reduced through the implementation of some joint and strength training.

Some Precautions to Take

  1. The archer should always respect his or her equipment by inspecting it before and after use. The examination should include looking for wear, tear, or broken parts or parts that look as if they need replacement. All parts of the bow, the arrow, release mechanisms, and other equipment needs to be inspected thoroughly.
  2. Check arrow bodies to ensure there are no splinters or unseen cracks.
  3. Examine the bow limbs, both upper and lower, for potential cracks.
  4. When the bow is strung, make sure it is strung correctly.
  5. Make use of a stringer to string a recurve bow as this is the safer solution for bow stringing.
  6. Make use of special safety equipment such as finger tabs, string releases, stringers, and forearm guards in order to maximize the protection of the body.
  7. When preparing to face the target or prey, look around to see what’s near you and within the pathway of you and the target. Make sure all areas are clear.
  8. Do not point the bow and arrow at another, especially if it is drawn. Do not draw the bow back to full draw until you have your target in your sight.
  9. Never release an arrow up into the air.
  10. Make sure the arrow is nocked before you fire. Always nock the arrow as you have the bow directed toward the ground: This will protect you and others in the event of accidental release.
  11. Do not overdraw a bow at any time. An overdraw occurs when you pull back the bowstring further than the actual length of the arrow you are shooting. Overdraws can result in significant injury as well as the damage and destruction of your equipment.
  12. If you are on a range shooting your bow and arrows, adhere to the rules of the range.
  13. Do not walk into the path of other archers.
  14. Care for your equipment to prolong its use and to ensure that it remains safe to use.
  15. Make sure you do not wear jewelry or accessories that will get in the way of using the bow and arrow.
  16. Wax your string for every 100 arrows of use to keep the string in good, unfrayed condition.
  17. If you are retrieving arrows, walk, do not run.
  18. If at a range and you want to retrieve equipment, you must wait until it is safe to do so. This is when the instructor calls out a command like “all clear” or “all bows down.”

Sources:

eHowSport’s “Archery 101: Safety Rules for Archery.” Video. URL: https://www.youtube.com/watch?v=ZpmvufefAYA.

ANR’S University of California’s “Clover Safe: Archery Safety.” PDF file: Newsletter #47. URL: http://safety.ucanr.edu/files/3158.pdf.

West Bend’s “Archery Safety.” Website. URL: http://www.cultureofsafety.com/safety-tips/archery/.

Morrisonville’s State College’s, “Archery Safety.” Website. URL: http://www.morrisville.edu/documents/studentactivities/archery/rangesafety.pdf.

Additional Resources:

Kidbow.com’s “Traditional Bows and Arrows for Children Safety.” Website. URL: http://www.kidbow.com/archery_rules_for_kids.htm.

Archery 360’s “Archery Safety Tips and Rules.” Website. URL: http://www.archery360.com/archery-for-beginners/archery-safety-tips-and-rules/.

How to Sight in a Bow: Step by Step Directions

Whether you like to practice your archery skills on the range or you use your bow and arrow to hunt live prey, you will want to take advantage of the tools and equipment that make it possible for you to make an excellent shot. Making sure you take your best shot is important, particularly when you are hunting, as you want to make every effort to have a clean kill: One that will prevent the animal’s unnecessary suffering. You also want to try to prevent any damage from occurring to your equipment, whether you are practicing or you are actually on a real hunt. It is impossible to simply pull back the bowstring and expect to hit your intended target with any degree of accuracy.

Thus, it is vital that you learn how to sight in your bow so you can improve the likelihood of striking the target you have chosen. The process of sighting in your bow allows you to make up the different for arrow drop caused by the gravitational pull over disturbances and distances once the arrow has been fired from the bow. Due to the importance of sighting in your bow to the level of accuracy, you will want to follow the steps provided here to make sure you make the most of every shot.

General Tips for Beginners

In order to sight in your bow correctly, you will want to spend some time each day for a few days to dedicate yourself to sighting in your bow. Over the course of a few days, you will be able to compensate for any issues that might arise due to fatigue, a shift in form of stance, or human error in general. If you span out your time and sight in the bow over the course of a couple of days, it will gain you a greater degree of accuracy with every shot you make in the future.

When you attempt to sight in your bow, make sure your arrows are the same weight and length. Also make sure your practice tips and hunting tips are the same weight. The weight is conveyed in grains. The tips should be at 80 to 100 grain for good performance.

Sights for Your Bow

There are plenty of different styles of bow sights you can choose from when you are looking for the perfect sight to mount to your bow for the purposes of improving your shot. If you are new to archery, you may find cost is your foremost concern and you might do well to focus on seeking out a sight for your bow based on affordability factors. However, many compound bows come equipped with a bow sight when you purchase them.

The easiest sights for you to use are often the most reasonably priced because the less expensive sights have fewer bells and whistles. With the easiest sights to use, you will find the devices fitted with some pins in an array of colors, all of which are set for the distances you determine. The pins are often independent of the other pins so you can adjust one pin without having to tweak or change the others. For the yardage/distance settings, you are left to determine the settings you desire, and you can preset up to three or four distances.

A sight will come equipped with a bracket for mounting the sight to your bow. The sight should be easy enough to mount as it will affix to your equipment with a few screws. You should verify however, that the sight will accommodate both left and right handed archers so you are guaranteed a sight that works no matter what your dominant hand is initially. The sights available on the market today include fixed pin sight, the sight with moveable pins, and the pendulum sight. The one you choose will be based on preference. In terms of sights and installation, there are two distinct forms of mounting brackets: dovetail and fixed, with the permanency of the fixed sight far more appealing than the removable dovetail solutions.

An affordable bow sight is right around $40.00. If you have been into archery for a while and you are looking to participate in tournaments, no doubt you will want to check out the more pricey sights for your bow. Since the most widely used sight is the fixed pin option, this article will focus on sighting in the fixed pin variant of bow sightings. Fixed pin sights are certainly suitable for recreation and hunting pursuits.

Installing the Bow Sight

Once you buy a sight, be sure to read the installation manual that comes with the sight. The sight is part of the bow that is attached to the riser. The sight should come with connections that make it possible to mount the sight to the bow with ease. You may find your bow actually has holes that are predrilled into it where you can attach the bow. When installing the sight, take care not to over tighten the screws during the install as you run the risk of damaging your bow. You will want the pins to line up with the bowstring vertically. The sight is installed at a right angle to your bow. You should let the sight settle for 24 hours before attempting to make adjustments. The next day, be sure to check and see if the unit requires a bit more tightening.
Setting the Sighting Pins

Using an Allen wrench, you can set all of the sight’s pins to mid-point. Taking this step will allow you to make the most of your adjustments in whatever direction you have to make the adjustments. When you are ready, make sure you have a target established. Once the target is all set up, you can mark four distances at 10-yard increments: 10, 20, 30, and 40 yards respectively. If it is necessary for you to do so, you can use a range finder in order to increase the accuracy of the distances you set. You will need a durable target as well, as you will be making several shots into the target repeatedly as you sight in your bow.

Once you buy a sight, be sure to read the installation manual that comes with the sight. The sight is part of the bow that is attached to the riser. The sight should come with connections that make it possible to mount the sight to the bow with ease. You may find your bow actually has holes that are predrilled into it where you can attach the bow. When installing the sight, take care not to over tighten the screws during the install as you run the risk of damaging your bow. You will want the pins to line up with the bowstring vertically. The sight is installed at a right angle to your bow. You should let the sight settle for 24 hours before attempting to make adjustments. The next day, be sure to check and see if the unit requires a bit more tightening.
Setting the Sighting Pins

Using an Allen wrench, you can set all of the sight’s pins to mid-point. Taking this step will allow you to make the most of your adjustments in whatever direction you have to make the adjustments. When you are ready, make sure you have a target established. Once the target is all set up, you can mark four distances at 10-yard increments: 10, 20, 30, and 40 yards respectively. If it is necessary for you to do so, you can use a range finder in order to increase the accuracy of the distances you set.

To sight in your bow, you must stand perpendicular to your target at the 10-yard mark and place a practice arrow with a practice tip in your bow. Pull back the bow to full draw. Glance down at the bow sight’s uppermost pin. Release the arrow toward the selected target. Repeat this process a few times. Look at where the arrows are hitting the surface of the target and consider what you see as you prepare to set your sight. After viewing where the arrows are landing, determine how to adjust the sight. For example, if the arrows you shot went just above the area that the pin’s sight, you should adjust the sight box by moving up on the bow. You will have to continue with this process until the bow is not longer firing and hitting the target about the pin in your bow sight. Once you are done with the ten-yard mark, you will step back to the 20-yard mark, and do it all over again, only this time you will focus on the second pin down from the top in your sight. The process is the same for the third and fourth pins in your site.

Sources:

Wiki How’s “How to Sight a Bow In.” Website. URL: http://www.wikihow.com/Sight-a-Bow-In.

ArcheryBuff.com. “How to Sight in Your Bow.” Website. URL: http://www.archerybuff.com/2011/how-to-sight-in-your-bow/.

Shooting Time.com’s “BOW SIGHT – ADJUSTING PINS, 2ND AXIS, AND 3RD AXIS.” Website. URL: https://shootingtime.com/bow-tuning/adjust-bow-sight/.

Petersen’s Bow Hunting’s “Goof-Proof Tips for Sighting-In Your Bow.” Website. URL: http://www.bowhuntingmag.com/tactics/goof-proof-tips-for-sighting-in-your-bow/.

Resources:

Learning Archery Blog. “How to Sight in Bow.” Website. URL: http://learningarchery.com/how-to-sight-in-bow/.

ArcheryReport.com’s “Sighting in Your Bow the Easy Way.” Website. URL: http://archeryreport.com/2011/06/sighting-bow-easy/.

OutdoorLife.com’s “Tune Up A step-by-step guide to assembling an accurate bow.” Website. URL: http://www.outdoorlife.com/node/1005005153.
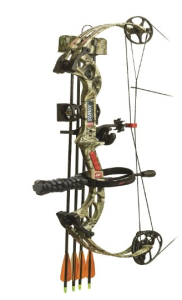
PSE Brute X Review

The PSE Brute X has a brace height of 8.125” to 7” depending on the model and year. It’s inexpensive, fast, well-balanced, and has almost no vibration. It also has a six-inch draw length adjustment. The PSE Brute is definitely named well considering its brute strength. This bow is tough and fast, but not only that, it’s also extremely accurate and forgiving. Because of this, some shooters have said that this bow cannot be compared to any other compound bow in its model class.

Finish

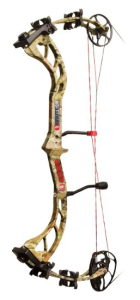
PSE Brute XLike the rest of this bow, the finish on its also very tough, resistant, and durable. However, it only comes in the Mossy Oak color rather than anything else.

Riser and Limbs

This compound bow has parallel precision made limbs that are connected to the rise using the Pivoting Hyperlight Unibody Limb Pockets. The pockets make the flawless limb placement for precision accuracy and reliability. Over the years, the CNC machined 6061 T6 aluminum risers have changed shape to continually stay strong, yet achieve the ultra-lightweight design coveted by hunters. All of these parts come together to make a very tough looking compound bow.

Grip

The earlier models came with the Vibracheck rubber grip, which was made to suppress the vibration and give a soft, comfortable feel. However, the grip is wide and can cause some hand induced torque. The most recent models have the SLT Grip. This is designed for consistent hand placement that will produce a much better accuracy. The Brute X has the best grip available.

Eccentric System

While the performance system on this bow has been evolving over the past few years, all the modifications are built to obtain a smooth draw cycle, consistent shots, and be easily adjusted and efficient, as well as fast. Previous models of the Brute advertised speeds between three hundred and three hundred and eight feet per second, but the newest model boasts over three hundred and twenty feet per second. This is due to the redesigned HP cam system. Over the past five years, the Brute has been in production and has seen four different cam systems. Each system various a bit as new technology was developed.

Every model has adjustable draw lengths up to six inches. Since 2007, the draw length adjustments are made using a rotational inner cam, further post adjustments require a bow press. During the first four years of production, the cams a let –off of eighty or sixty-five percent, but the newest model has a let-off of seventy-five percent.

Draw Cycle

With the easy drawing single cam performance system and the silencing package this compound bow has, this makes the Brute X a well-balanced bow that gives the shooter a quiet shot with very little hand shock. It’s a smooth drawing bow with a solid back wall that’s easy to hold. In addition, adjustments can be made to the draw cycle to suit your feel. Upon release, this bow is quiet and almost vibration free. The earlier models might have required stabilizers, but this model doesn’t need that because it comes with the VibraCheck Hush Kit.

Excellent for Hunting

The Brute X is definitely a hunting bow to the core. It’s well-built, accurate, and fast for any type of hunting. Hunters won’t need to make large movements in the stand to draw this bow back, thanks to the smooth and easy draw cycle, which allows the hunter to remain concealed.

In Conclusion

The PSE Brute X has been one of the greatest bows for the money on the market for the previous five years. Priced at $400 for just the bow, you don’t expect to get the bow that you receive in the box. Consider this, the Brute is priced at far less than most of the comparable bows from the competition, and it gives you the same performance of the high-end bows. In fact, the Brute shooters say the bows are underpriced and that you can’t pass up an opportunity like this.

So if you’re a hunter looking for a quiet, excellent bow that will take down just about any game, then you want to check out the PSE Brute X!

Martin Lithium Compound Bow Review

Martin Lithium ProWere you ever out in the field, listening, standing motionless, paying attention for your target prey? Were you out in the wilderness and saw the most stunning pretty just standing there, spotted it in your sights, and then slid the arrow into place only to have the arrow squeak and frighten that target away before you were able to release our grip? Or you had the chance to actually release the arrow but you missed the target entirely?

There are some unfortunate incidences during hunting with compound bows, but did you know that having the proper bow could fix that problem? The right bow will not only ensure that there is quiet and shoots right where you want it to shoot, but it will also make everything you do as the hunter easier. This bow does exist. It’s called the Martin Lithium.

Specifications

The Martin Lithium Compound Bow is an amazing bow regardless of the shooter’s hunting style. It shoots around 335 feet per second, has an eighty percent let-off, and has a peak draw weight of fifty to seventy pounds. It also has a draw length of twenty-six inches to thirty-one inches, a brace height of seven inches, and an AtA of 33.25. To make it just a bit better, it weighs only four pounds!

The Martin Lithium Bow has a one-piece, solid connected riser and comes equipped with the company’s original vibration escape system. This bow is coupled with the completely changeable Nitro 3 cams, the x4 Twin limbs, and the carbon STS. It is so great that every kill you make is going to feel like a reward.

It comes in the colors of Mossy Oak Break-Up Infinity and Black, allowing you to blend in with your surroundings and make the kill before your target even knows what’s coming. The Martin Lithium Bow has an incredible blend of speed, smoothness, and stability that makes this bow the perfect hunting and competition bow out there.

Quality

The Martin Lithium Bow’s strings are one of the world’s finest available. They’re made out of a hundred percent BCY materials of the best grade and are twenty times stronger than steel. Before you receive this bow in its packaging, the strings have been fully pre-stretched so that you avoid any stretching complications. In addition, the Martin Lithium Bowstrings have a no peep rotation that’s included in their list of amazing qualities.

This bow has a capture rest that will provide full capture and enclosure of the arrow while still providing complete vane clearance, which there isn’t any drag or a loss of speed. The included armguard with the quick-snap fasteners is completely innovative. It also comes with a detaching, adjustment, and installation that are easier than some of the simplest bows. It has a fast four quiver with two VEMs integrated into it that catches and destroys any vibration noise that could frighten a target.

The twist lock release system is much lighter and tighter locking than any of their previous bows. The rubber hood is steadfastly stuck into place and stores field points and bred head by the tip in order to ensure that they are their sharpest. The Martin Lithium Compound Bow even comes with dual arrow clips that hold the arrows more securely than any other quiver available on the market, yet it’s simple and easy to remove, as well as use.

Arrows

The carbon arrows that come with the bow are also top of the line. They are thirty-one inches in length and are guaranteed to be within 0.003 in straightness in its entirety every time you use the bow. The weight is matched with +/- grains throughout the one dozen arrows, making it dependable, reliable, and consistent.

They come in many sizes, from three hundred to 9.9 GPI or grains per inch, to three hundred and fifty at 8.8 GPI, to four hundred at 8.1 GPI, and five hundred at 7.2 GPI. They also include the Bohning Double Lock nocks, too.

In Conclusion

If you’re looking for top of the line craftsmanship in order to compare with your need as a well-trained shooter, then you should highly consider the Martin Lithium Bow. This is an excellent bow to go out into the wilderness with and go in for that dream kill. When you purchase this bow, you’ll be warmly welcomed by the company, who will guarantee you years of enjoyment.

It’s a good thing to note that all compound bows from the Martin Company are handmade one at a time. The martin Company has stayed a family owned and operated business while others have sold out. They work very hard to satisfy their customers.

If you want a second perspective, check out this video review: